April 16, 2020
  5 Min
5 Min  No Comment
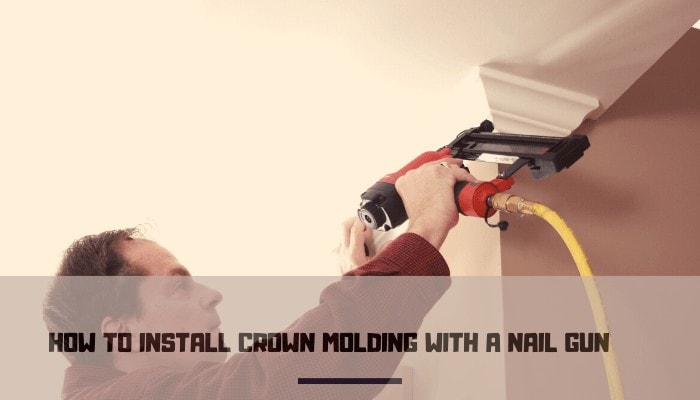
Installing crown molding uplifts the aesthetics of your interior by giving your wall and ceiling a distinctive decorative look. Depending on the size and designs of your moulding you can definitely bring your own artistic touch in your own home. It can be used to cover any kind of defect on your walls too.
You may think that it will be a hassle to install the crown moulding by yourself and you will need professional help for it. But you can easily install crown moulding with a Nail gun by following a few simple and easy steps. Using a nail to install crown moulding can save time and keeps the moulding damage free which can occur due to the use of a hammer.
Now follow the five easy steps to install Crown molding with the help of a nail gun.
Step 1: Choosing the right crown molding
Choosing the right design and size of crown moulding to decorate your home can be tuff. The design depends on your taste and artistic mind. You may consider your Home Style and choose a design which goes appropriately with it. On the other hand the size of the Crown molding depends on your ceiling height. The higher your ceiling height the wider your crown molding should be. The thickness of the crown moulding depends on your choice. You can easily collect samples from your desired supplier and check at your home to find the right one. Make sure that you buy enough to cover your desired length properly. In case of curved wall you have to buy the appropriate curved section to cover it properly.
Step 2: Choosing the right nail gun
Choosing the right nail gun is important for perfect and precise installation. A lightweight powerful nail gun full is necessary to do the job. The lightweight allows you to hold the nail gun easily and do the job effortlessly. The power of the gun is necessary to attach your Crown molding to wall studs. So a wireless pneumatic nail gun which is light in weight has moderate power and a comfortable grip is perfect for this job.
[amazon bestseller=”Best Nail Gun” items=”3″ grid=”3″]
Step 3: Preparing the crown moulding
Before installing the Crown molding you need to cut it appropriately. Use a measure tape to measure and cut the molding precisely so it can fit accurately on wall angles and corners. Use a saw with a sharp edge to cut your molding. A wood saw is perfect for this job. Make sure the lengths are perfect before you cut. You can use a marker to make the lengths correct.
Step 4: Installation of the crown moulding
- Clean the areas first where you are going to attach the moulding. Make sure the surface is dust free.
- Hold the molding perfectly so that it is perfectly aligned with the ceiling and wall.
- Then you have to find the wall studs. Locate the center of the stud as you have to nail the molding to it. Measure 16 inches or 24 inches from one wall stud to find the next one as they are usually spaced as such.
- After finding the studs, hold the nail gun flat on the molding.
- Then fire the nail gun. Before firing the nail gun make sure that the moulding flat on the wall and ceiling.
- Use 5-centimetre or 2-inch finishing nails to attach the crown moulding. Make sure that you put nails at every 16 inches intervals on the frame.
- Put nails in the middle of the frames first then continue on the edges. It will give you a smooth and aligned finishing.
- It is necessary to put nails both on the wall and ceiling.
- The length of the nail may vary due to your moulding thickness.
- If you do it properly then the nail gun would penetrate the moulding nicely and attach them properly on the wall surface. Just make sure you hold the moulding accurately while firing the nail gun.
Step 5: Filling the nail holes with putty
Finally to fill the nail holes you need a non-shrinking filler or putty. After filling the holes let them dry and lightly sand the areas to remove excess filler. Usually, it takes 24 hours for the putty to dry. In case of any scratches which may happen during the installation process use wax based filler to conceal them. You can use chalk to smooth them out too. Follow the manufacturer’s directions accordingly before applying the filler or putty. In case of wood-color crown moulding you have to choose the filler with proper color. You can paint over after using normal putty too.
Final Thought
Using a nail gun is easy and time saving when it comes to installing crown moulding as they allow you to install fragile moulding without destroying them. So give it a try and make you interior splash with a beautiful and artistic new edge.
Related Article: